When it comes to gifts, presentation is everything.
Wrapping paper will do in a pinch, I suppose. But if you’re looking for a presentation idea that’s pretty enough to be a gift all by itself, a gift tin wins every time.
Today I’ll share how I make these keepsake tins in just three easy steps.
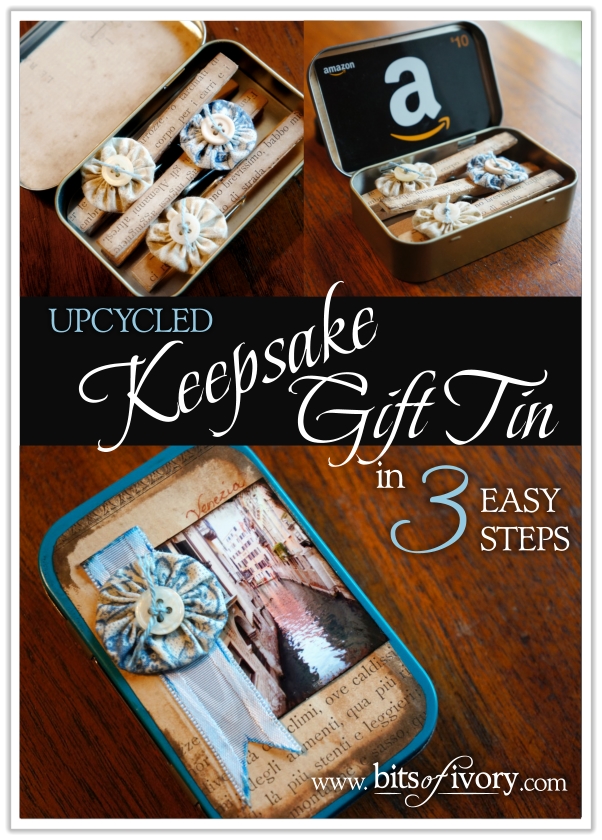
For this project I used Altoids® tins. I love Altoids and it seems like a terrible shame to throw the little tins away. These tins are the perfect size for lots of different projects, come in fantastic colors (flavors) and are really easy to find.
On Monday I shared a unique teacher appreciation gift idea – Clothespin magnets that happen to fit perfectly into this tin! As a bonus, a standard sized gift card can be tucked right inside the lid!
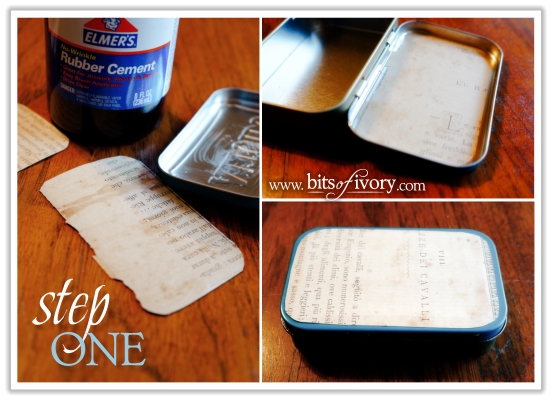 Step One: Cover the top of the tin (inside and out) with paper.
Trace around the bottom of the tin on the paper you want to use for your project. Trim the paper just inside that line. I chose a page from an old book that coordinated with the gift magnets that would go inside. Adhere the paper using rubber cement by evenly coating both the paper and the tin, allowing to dry, and then pressing the paper into place. Any excess adhesive can be easily rubbed off of the tin using your finger.
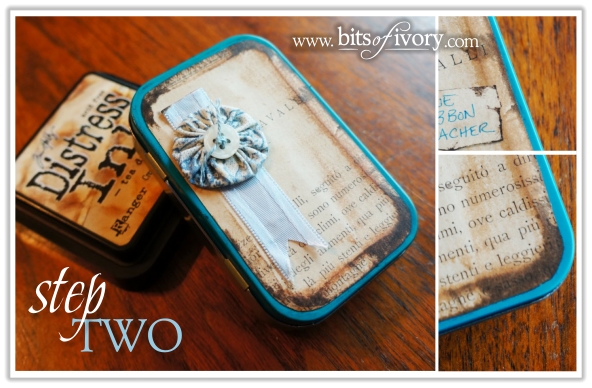 Step Two: Distress the tin with ink and sandpaper.
Using distress ink, ink the edges of the paper for an aged look. I like to do this step after adhering the paper to the tin because the raised portions of the tin catch the ink and give the project even more depth. I used tea dye and walnut distress inks from Ranger for this project.
If you wish to age the paper on the inside of the lid to match you can use a brush, or ink the paper before adhering in step one. For added depth without the distress trying rubbing the edges with colored chalks instead of ink.
Lastly, for even more aging lightly sand the edges of the tin with a fine grain sandpaper to take of a little bit of the paint.
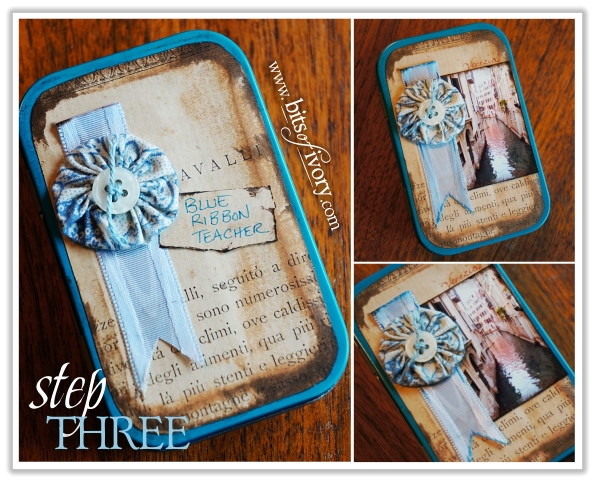
Step Three: Personalize and Embellish.
For this project I started with a “blue ribbon teacher” embellishment made from a blue ribbon, and a blue fabric yo yo that coordinated with the magnets. I used glue dots to adhere them in place. I added a tag that read “blue ribbon teacher” as the first option. The blank spaces on the page were a perfect spot to personalize the tin with a handwritten message.
I finally settled on a photo I took in Venice a few years ago to compliment the Italian text on the paper I chose. It provided precisely the old world, classic look I was going for. Other embellishment ideas include paper flowers, stickers, chipboard letters, glitter, etc. Really, the sky is the limit. For a more masculine look think gears, old automobile photos, fishing lures, etc.
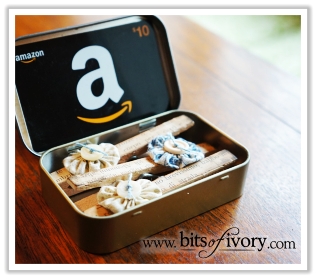 Other ideas for gifts for your keepsake gift tins:
- Garden seeds
- Hair clips
- Ribbon hair bows for a new baby girl
- Thumb drives with family or vacation photos
- Buttons or embellishments for a crafter
- MP3 player/ear phones/music gift card
