We’re back with a flashback fabric yo yo project this morning.
These cards are really simple.
I say that a lot, but the truth is I really do love simple projects that are done quickly.
When I had little ones I loved projects that could be done and cleaned up during naptime. Now I love projects that are easily accomplished in the evening after work – or even on a lunch hour.
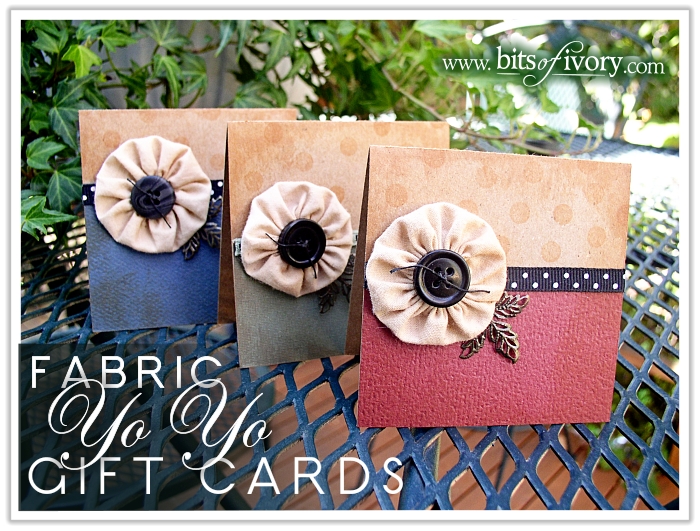
These little cuties have been one of our most requested projects from the Fabric Yo Yo post, and so here they are again, this time with step-by-step instructions and measurements.
Materials to make six cards:
- 1 12×12″ sheet of kraft colored cardstock
- Cardstock pieces in complimentary colors cut to 3″ x 2″
- 6 fabric yo yos from this tutorial
- 6 contrasting buttons
- Metal leaves (from handmade jewelry department)
- 2 feet of quarter inch Polka Dot Ribbon
- Needle
- Pencil eraser
- Distress Ink (Ranger Tye Dye)
- String
- Adhesive
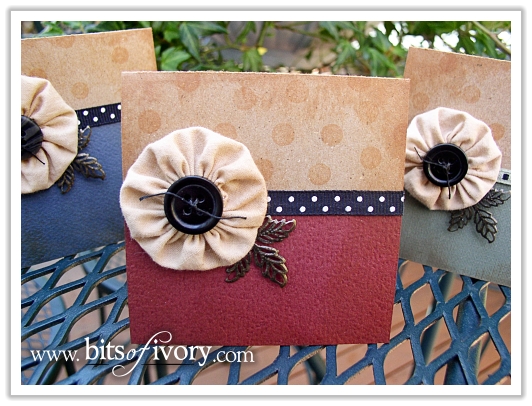
Start by cutting the 12×12″ cardstock in half and then into thirds to make 3″x 6″ pieces.
Fold these in half to create your 3″ x 3″ card base.
Swipe the front edges and corners of the cards across the distress ink and then use your pencil eraser and the distress ink to create polka dots across the tops of the cards.
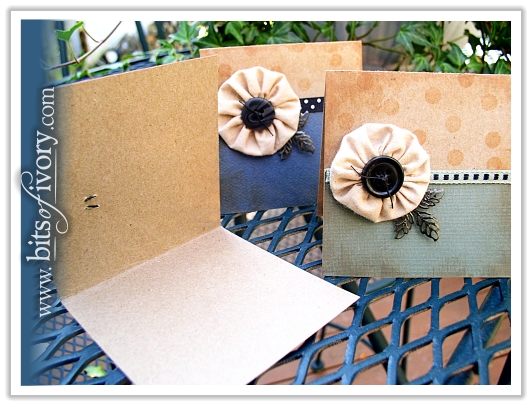
Ink the edges of the small cardstock pieces then adhere them to the bottom of the card front.
Adhere the ribbon to the front of the card, covering up the edge of the small piece of card stock. Trim the ribbon right to the edge of the card. * I really love glue dots for attaching ribbon. one on each end and one in the middle will keep it perfectly in place.
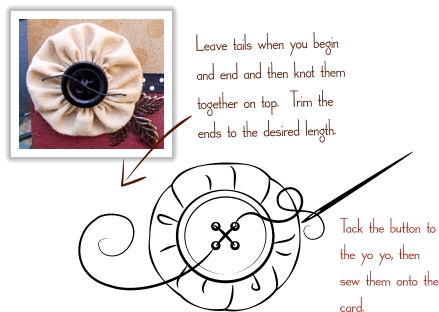
Sew the yo yo to the card by placing the button over the center of the yo yo and stitching the button through both the yo yo and the card.
Adhere the leaf under the edge of the yo yo blossom. * Glue dots work great for this too!
That’s it! Six adorable gift cards in one naptime or lunch break using the yo yos you’ve made up ahead of time!
And if you’re looking for more adorable yo yo projects, check out the adorable tote at A Peek Into My Paradise designed by my friend Carrie from A Mother’s Shadow!
